First of all, thank you for choosing our theme. This documentation is meant to created to help you get started creating your site with our theme. In case you run into any kind of issue that you could find on the documentation, please feel free to get in touch with our dedicated support team on our support desk.
Server Requirements
There are two ways to install a WordPress theme: using the built-in installer or by uploading it via FTP
PHP version 7.2 or greater
MySQL version 5.6 or greater OR MariaDB version 10.0 or greater
WordPress memory limit of 128 MB or greater
HTTPS support
Download the theme
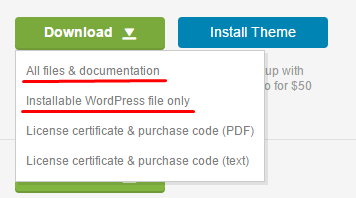
Download Theme files from Themeforest by going to the Downloads tab and finding the Clotya Theme.
All files & documentation: It is a product archive with documentation,plugins folder and some additional files like changelog, lisense etc
Installable WordPress file only: It is the archive theme-name.zip with the theme itself -this file you need to install.
If you get such an error while you're installing the theme The package could not be installed. The theme is missing the style.css stylesheet. then it is likely you try to install the whole theme files including the documentation and the others. You have to make sure you installed the installable WordPress file only.
Installing the theme
There are two ways to install a WordPress theme: using the built-in installer or by uploading it via FTP.
1. Installing using the WordPress theme installer
From the dashboard go to AppearanceThemesAdd NewUpload Theme
Click on “Choose File” and select clotya.zip;
Click on “Install Now”.
Step-1 Add New
Step-2 Upload Theme
Step-3 Choose File
2. Installing via FTP
This is a more advanced way to install your theme. To install Clotya via FTP:
Download the Theme archive and extract the files it contains;
Use an FTP client to access your hosting server;
Unzip the clotya.zip archive, put its contents (folder called clotya) in the /wp-content/themes directory provided by WordPress;
Go to Appearance → Themes, find Clotya and activate it.
Example - Import Demo Data
After activated the theme please use theme setup wizard to make your website like our demo.
From the dashboard go to DashboardAppearanceTheme Setup
Play Video
Updating the theme
We strongly recommend always keep your theme up to date. Check the latest version in the changelog. Also, make a backup before updating the theme. If you're experiencing updating issues, deactivate all 3rd party plugins and try updating again.
Please first of all make sure that you have the Envato Market plugin activated. If you don't have the plugin, please activate it from Dashboard > Appearance > Install Plugins
Go to https://build.envato.com/create-token/
Give your token a name, agree to the terms and click on the “Create Token” button;
Copy the generated token;
From the dashboard go to Envato Market and paste your token in the Token line;
Finally don’t forget to save the changes.
Header Settings
You can find logo, header general, header products tab, preloader options.
Logo
Go to DashboardAppearanceCustomizeHeader SettingsLogo
Header General, Header Notification Settings
Go to DashboardAppearanceCustomizeHeader Settings
Header General -1
Header General -2
Ajax Search Form
Header Notification
Header Social
Shop Settings
You can find in general and breadcrumb options.
Go to DashboardAppearanceCustomizeShop Settings
General, Product Detail and Banner Settings
Shop General -1
Shop General -2
Shop General -3
Product Detail -1
Product Detail -2
Product Detail -3
Blog Settings
You can customize the blog settings.
Go to DashboardAppearanceCustomizeBlog Settings
Layout
Footer Settings
You can find top footer, subscribe, footer general options.
Go to DashboardAppearanceCustomizeFooter Settings
Footer General
Footer Subscribe -1
Footer Subscribe -2
Main Color Settings
You can find in main color settings.
Go to DashboardAppearanceCustomizeMain Color
Site Identity Settings
You can find in site identity settings.
Go to DashboardAppearanceCustomizeSite Identity
Menu Settings
You can find in Primary Navigation, Sidebar, Top Left, Top Right and other Menu Settings
Primary Navigation Menu Settings
Play Video
Sidebar Menu Settings (Home Page)
Play Video
Top Right Menu Settings
Play Video
Widgets - Settings
You can find in Footer - First, Second, Third, Fourth, Fifth Column. You can also adjust your blog and shop sidebar settings.
Go to DashboardAppearanceWidgets
Widget Options
Play Video
Blog and Shop Sidebar Widget Options
Play Video
Homepage Settings
You can set a frontpage from DashboardAppearanceCustomizeHomepage
Additional CSS Settings
You can add additional css.
DashboardAppearanceCustomizeAdditional CSS
Clotya- Editing With Elementor
Customizing pages with Elementor.
Homepages - Editing With Elementor
Play Video
Contact Page - Editing With Elementor
Play Video
Page Setup
if you want to get started manually, or skipped the setup wizard, then you need to get a set of shop pages, here is what you need to do:
From the dashboard go to WooCommerceStatusTools
Find the Create default WooCommerce pages option
Hint the Create pages button on the right.
Account & Privacy
You can find checkout, account creation and privacy policy options;
From the dashboard go to WooCommerceSettingsAccount & Privacy
Translation
You can freely translate our all themes thanks to Loco Translate plugin.
The logo does not change - Customizer - Elementor Editor?
Play Video
How to import Elementor template?
Play Video
How to add label in sidebar menu?
Play Video
How to enable free shipping bar in WordPress theme - [WooCommorce]
Play Video
How to add a badge?
Play Video
How to Fix ” The theme is missing the style.css stylesheet” issue in WordPress
Play Video
How to edit the size chart on the product detail page?
Play Video
Why the shop page is blank?
Play Video
How to resize logo?
Play Video
How to enable Right-to-Left (RTL Arabic) version for your WordPress website?
Play Video
How to choose an attribute type (checkbox) for Shop Sidebar?
Play Video
How to make mega menu?
Play Video
How to enable Recently Viewed Products?
Play Video
How to enable the Ajax Filters for the store page?
Watch our video to activate this important feature.
Play Video
How to edit the mobile bottom menu?
Play Video
Elementor how to enable Editing Handles?
Play Video
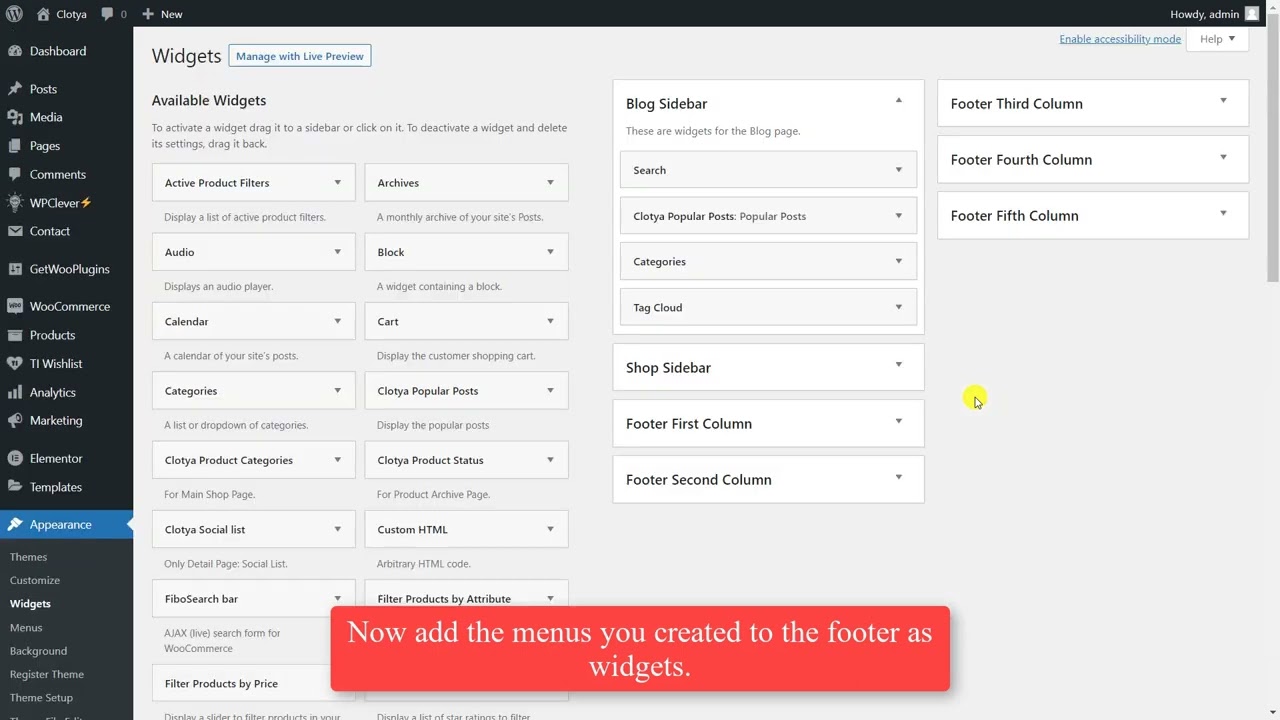
Where to add menus to footer?
In this video we will show you how to add menus to the footer.
Play Video
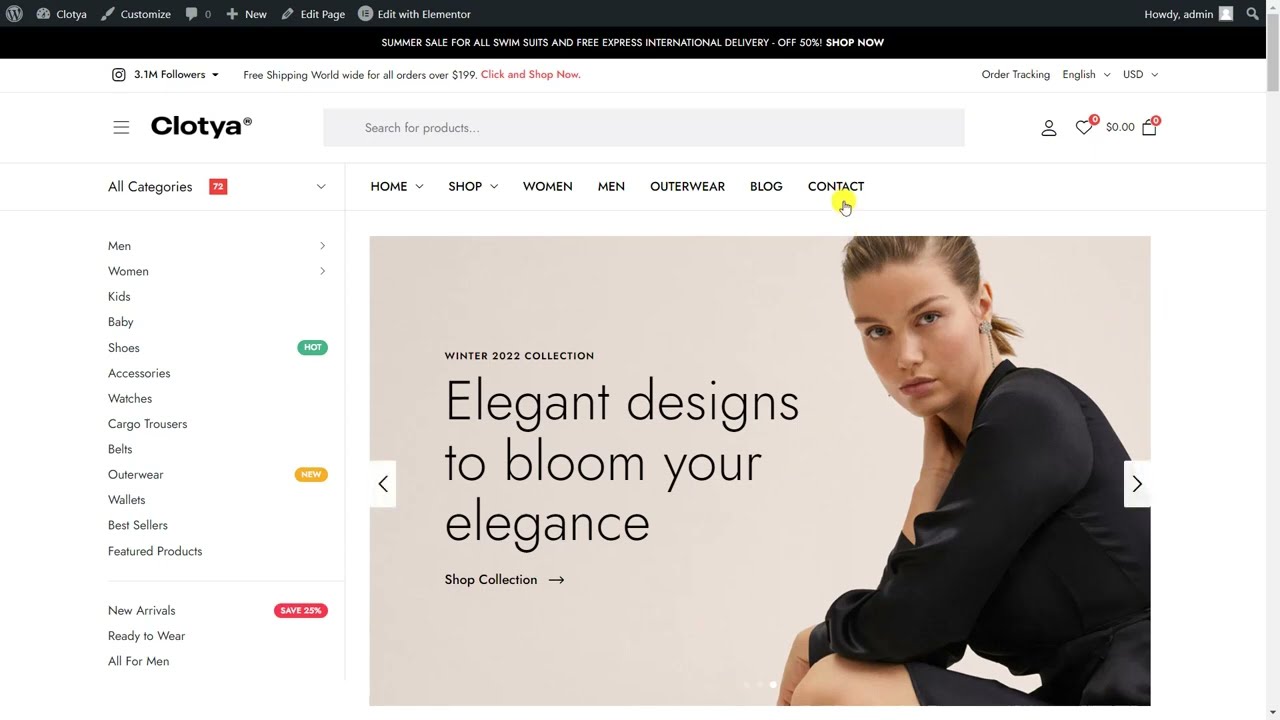
How to enable product categories on menu?
You can easily add product categories to the menu by watching the video.
Play Video
How to add a product video?
Play Video
How to enable Product Image Zoom?
Play Video
How to set Cart - Checkout and My Account Page?
Play Video
How to make multivendor wordpress website [WC Marketplace Plugin]
How to enable the extra fields for the registration - WooCommerce?
How to add a banner for each category?
To add a banner to each category, first add a new row by following the steps below.
From the dashboard go to
DashboardAppearanceCustomizeShop SettingsBannerAdd New Row
Then add the image, title, subtitle and link as in the image.
Why the mini cart is broken?
If you are using Elementor Pro and the Mini Cart is broken, please cancel the mini cart option by following the steps below.
From the dashboard go to
DashboardElementorSettingsIntegrations
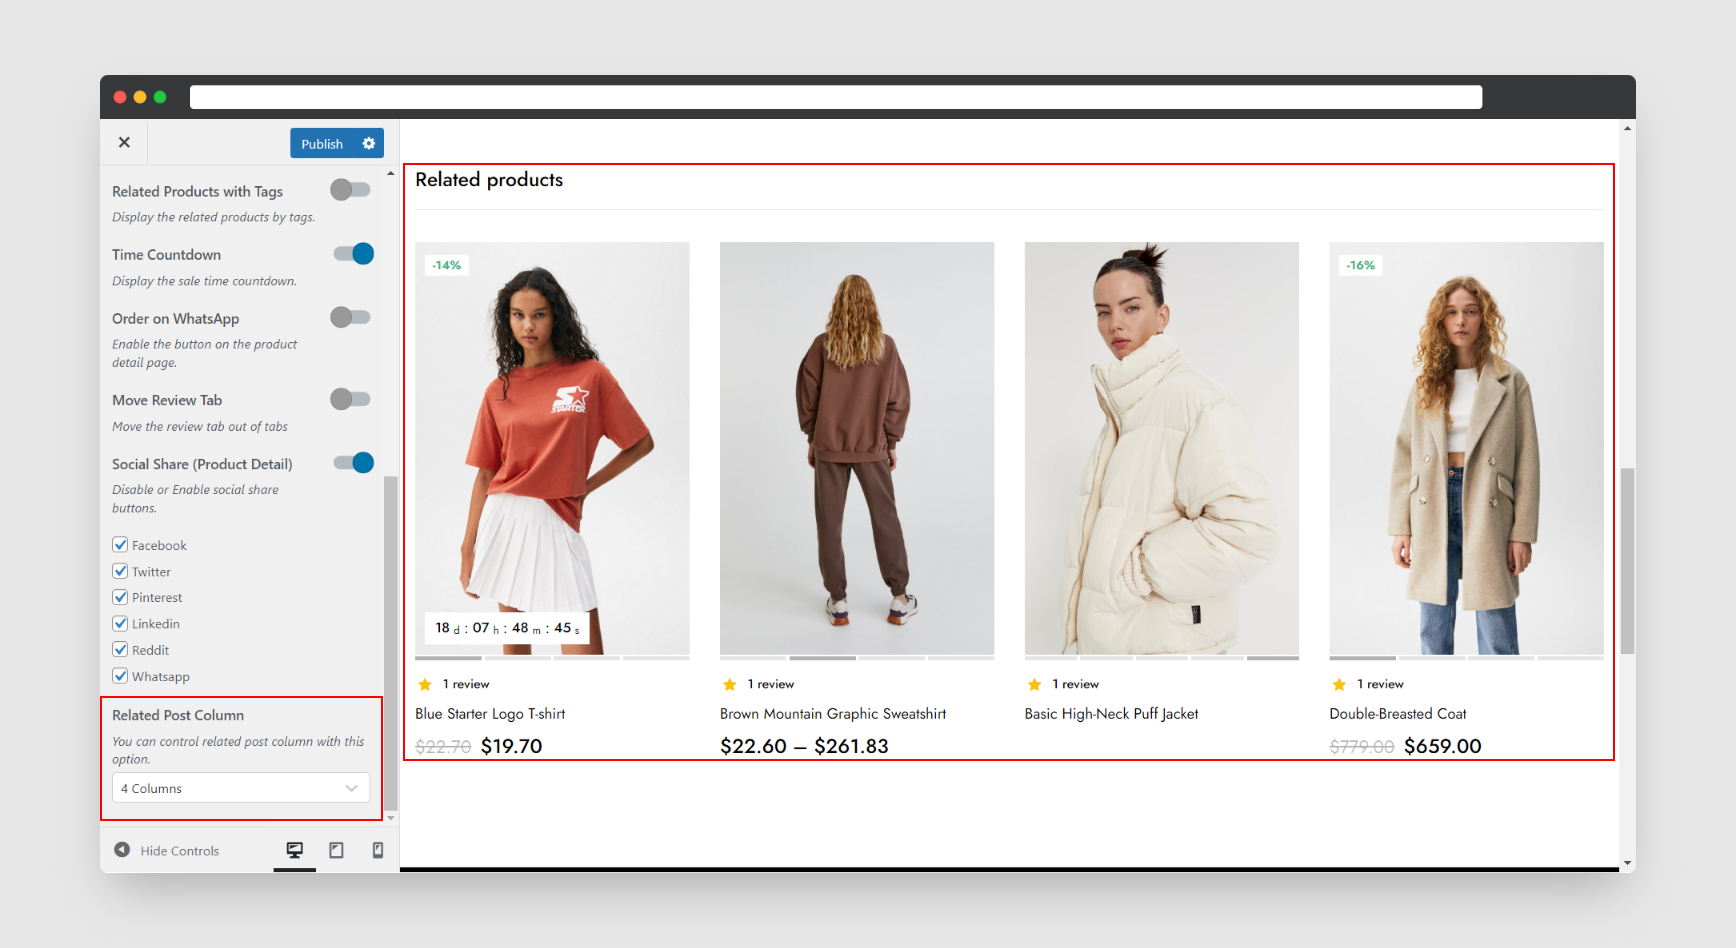
How to enable Move Review Tab?
From the dashboard go to
DashboardAppearanceCustomizeShop SettingsProduct DetailMove Review Tab
How to enable Popup Newsletter?
DashboardAppearanceCustomizeNewsletter Settings
How to change the footer logo?
From the dashboard go to DashboardAppearanceWidgetsFooter First Column
How to change header type from customizer?
From the dashboard go to DashboardAppearanceCustomizeHeader SettingsHeader GeneralHeader Type
How to change header type from elementor editor?
Click edit with Elementor and change the header type from the settings as in the image.
How to enable enable Login Tab in my account page?
From the dashboard go to DashboardAppearanceCustomizeShop SettingsMy AccountLogin Tab
How to enable Ajax Notice feature?
From the dashboard go to DashboardAppearanceCustomizeShop SettingsGeneral
How to enable Sticky Header for Mobile?
From the dashboard go to DashboardAppearanceCustomizeHeaderHeader General
Why are product images not showing?
First Step
If the images of the products do not appear correctly, please follow the steps below.
Important note: If the Jetpack plugin is installed, follow the first step.
DashboardJetpackSettingsEnable site accelerator
Second Step
If Jetpack is not installed, follow the second step and apply.
First of all, follow the steps from the panel and enter the Shop Settings section. Find Product Image Size. Remove Width and Height. Check out the image below.
Go to DashboardAppearanceCustomizeShop Settings
How to enable ajax add to cart for product detail?
Go to DashboardAppearanceCustomizeShop SettingsProduct Detail
How to disable sidebar collapse on frontpage?
DashboardAppearanceCustomizeHeader SettingsHeader General
How to adding a variable product?
Variable products are a product type in WooCommerce that lets you offer a set of variations on a product, with control over prices, stock, image and more for each variation. They can be used for a product like a shirt, where you can offer a large, medium and small and in different colors. For detailed information, please click or watch our tutorial video below.
Play Video
How to add a favicon ?
From the dashboard go to AppearanceCustomizeSite Identity
How to change the currency symbol?
From the dashboard go to WooCommerceSettingsGeneral
How to enable registration form?
From the dashboard go to WooCommerceSettingsAccount & Privacy
Why the price filter and categories are not working?
From the dashboard go to WooCommerceStatusToolsProduct Lookup TablesRegenerate
How to change wordpress site language?
You can change the site language by following the steps below.
From the dashboard go to DashboardSettingsGeneralSite Language
Support
You can ask your questions on http://klbtheme.ticksy.com/
Thank You
Again, thank you for purchasing Clotya - Fashion Store WooCommerce Theme. If you need some help, or support please use email or contact form via themeforest profile site.
Hope you happy with the theme, all the best with your business.